NOTE: This page is a reference for Incidents screens available before the 1.12.0 release. (Background on screen versions.)
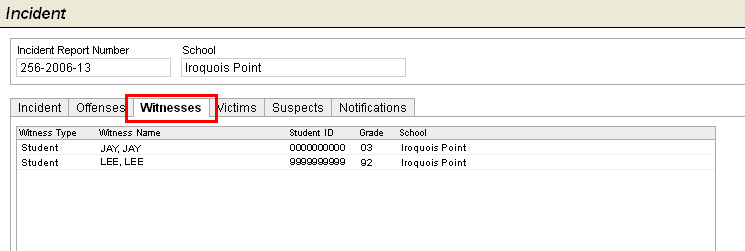
Use the Witnesses tab to add witness statements to the selected incident.

To Add a new Witness Statement:
On the Incident tab of the School Profile, open the appropriate incident.
Select the Witnesses tab.
Click Add to display the Incident Witness window.
Select the Witness Type from a drop-down box. Options are Student or Non-Student.
If the Witness Type is a Student, use the LiveSearch to locate the Student Name. When the Student Name is selected, the Student ID, Gender, Grade, and School will be displayed automatically.
If the Witness type is a Staff, enter the witness' Name.
Select which specific Offenses were witnessed. Only Offenses associated with the Incident are displayed.
Type the optional witness' statement in the Witness Statement text box. The box scrolls so you can enter additional text to include the full statement.
Click OK to save the changes.
Proceed to enter information on the appropriate tab:
Investigation - Record basic Incident Information and a Summary of Statement of Acts Committed.
Offenses - Identify alleged offenses. Use worksheets to document evidence relating to the named offense.
Witnesses - Identify witnesses and the offenses they allegedly had seen. Record witness statements.
Victims - Identify victims and the alleged offenses under which they have been victimized. Record date parent or guardian is notified. Record victim statements and disposition.
Suspects, and Disciplinary Actions - Identify suspects and possible motivation for the alleged offenses. Record suspect statements and note whether the offenses are suspect or verified.
Notifications - Record various types of notifications related to victim or suspect.
19-A/B:- Summary information that prints to forms 19-A and 19-B.