
ELD Curriculum can only be assigned to students with existing ELL Worksheets. You can assign ELD Curriculum to individual students in Student Profile, or to groups of students from the Mass Supports tab in School Profile.
To assign ELD Curriculum to an individual student:
From the ELL Worksheet:
Highlight English Language Learners (ELL). The Actions menu will change.
From the Actions menu, select Open Program.
The English Language Learners (ELL) window is displayed.
Click New Version.
The Version Comment modal window is displayed.
Enter Reason for New Version and select applicable Reasons from the check box list.
Click OK.
Select the Start Program tab of the English Language Learners (ELL) window.
Click Add on the ELD Curricula list box.
The ELD Curriculum screen is displayed. Enter ELD Curriculum information:
Curriculum Name – Click Select.
From the Add Curriculum modal, select curriculum.
Previously selected curricula will not be displayed; with the exception of "Teacher-developed ELD curriculum", which may be selected more than once.
Click OK.
Enter the Start Date in MMDDYYYY format. (Tips for entering dates.)
End Date and Results – Complete these fields and Save to close the curriculum. End Date must be within the current school year.
Enter Frequency.
Enter Curriculum Descriptor. This field is required for "Teacher-developed ELD curriculum".
Enter Notes/Analysis.
Click Save then Close. The selected curriculum is now assigned to the student.
Repeat steps 12 through 14 (adding curriculum) as necessary.
From the Supports Tab Curriculum Node:
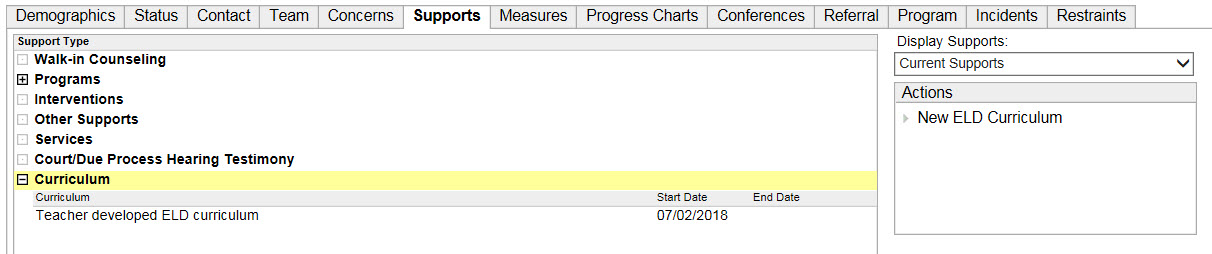
Highlight the Curriculum node.
From the Actions menu, select New ELD Curriculum.
The ELD Curriculum screen is displayed. Enter ELD Curriculum information (see steps 13a through 13f above).
Click Save then Close. The selected curriculum is now assigned to the student.
To Edit or Delete existing ELD Curriculum:
From the ELL Worksheet:
Select the Supports tab.
Expand Programs.
Highlight English Language Learners (ELL). The Actions menu will change.
From the Actions menu, select Open Program.
The English Language Learners (ELL) window is displayed.
Click New Version.
The Version Comment modal window is displayed.
Enter Reason for New Version and select applicable Reasons from the check box list.
Click OK.
Select the Start Program tab of the English Language Learners (ELL) window.
Highlight the ELD Curriculum you wish to edit or delete.
To Edit, click Open and edit as appropriate. Click Save then Close.
To Delete, click Delete. Click OK in the message box to confirm. Click Save then Close.
The changes are now reflected in the student's ELL worksheet.
From the Supports Tab Curriculum Node:
Select the Supports tab
Expand Curriculum.
Highlight the ELD Curriculum you wish to edit or delete.
To Edit, click Open Curriculum from the Actions menu and edit as appropriate. Click Save then Close.
To Delete, click Delete Curriculum from the Actions menu. Click OK in the message box to confirm.
Upon adding ELD Curriculum for a student, a Curriculum node will also be added to the Concerns tab, under the Second Language Concern.

For Reference to ELL Instructional Materials, click here.