
NOTE: This page is a reference for Incidents screens available before the 1.12.0 release. (Background on screen versions.)
Naming suspects is part of logging an incident. Suspects are named on the Suspects tab of the Incidents screen.
To name suspects for the incident, do the following:
On the Incident tab of the School Profile, open the appropriate incident.
Select the Suspects tab.
Click Add.
Use LiveSearch
to find the name of the suspect. This
is a required field.
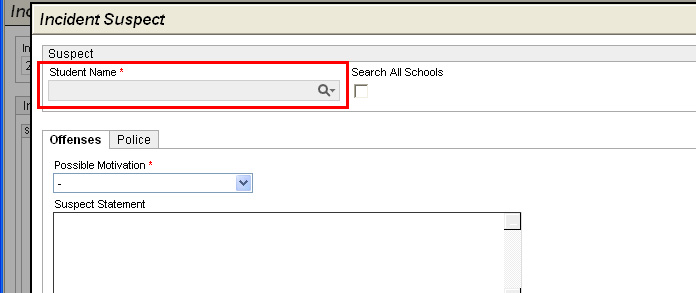
Use drop-down list to name Possible Motivation. This is required.
Enter Suspect Statement as text or check Statement on File to indicate that the statement is on file.
Highlight the offense(s) to which the suspect is connected, then click Select. An X is displayed under Suspected.
Upon completion of the investigation, if the suspect is verified as having been involved in the offense, highlight the Offense and click Verify. An X is displayed under Verified.
Select the Police tab, if applicable.
Enter Arrest Information, including Arrest Date, Arrest Time, Police Officer Name and Police Officer Badge Number.
Enter Arrest Notification information about how the parent or guardian had been notified about the arrest. This includes Date of contact, Time of contact and name of Parent/Guardian.
Click OK. Changes are saved, and you are returned to the Incident screen.
The following are tabs on the previous version of the Incidents form:
Incident - Record basic Incident Information and a Summary of Statement of Acts Committed.
Offenses - Identify alleged offenses. Use worksheets to document evidence relating to the named offense.
Witnesses - Identify witnesses and the offenses they allegedly had seen. Record witness statements.
Victims - Identify victims and the alleged offenses under which they have been victimized. Record date parent or guardian is notified. Record victim statements and disposition.
Suspects, and Disciplinary Actions - Identify suspects and possible motivation for the alleged offenses. Record suspect statements and note whether the offenses are suspect or verified.
Notifications - Record various types of notifications related to victim or suspect.
Investigation - Free text fields to record allegations, evidence, investigation findings and reasons for discipline.
19-A/B:- Summary information that prints to forms 19-A and 19-B.