The Service Log is where service providers log supports or services identified in 504 Plans and IEPs. A copy function makes it easy to log the same service for multiple students, or a repeating service for a single student.
The Service
Log screen is accessed via the Navigation
Menu. However, if you do not have access to this link, you must
log entries in the Referral within
the appropriate plan or via Student Profile
> Supports tab.
IMPORTANT NOTE TO SERVICE PROVIDERS: Before proceeding, please note the following:
Services must be provisioned for the student in the appropriate plan or screen. For example:
Services must be provisioned in the 504 Plan or IEP of the Referral. This includes Supplementary Aids and Services.
Logs for Supplementary Aids and Services may be entered from the Service Log or Student Profile > Supports tab.
Service records for supports (such Court/Due Process, School Consultation, Medication Management and Education Team Planning and Participation) can be documented on the Service Log. However, they must first be provisioned on the Student Profile > Supports tab.
You must be the requested provider for the provisioned services or be authorized by the provider to log services on the provider's behalf.
You can log services for one or multiple students. Students must first be on any of your Student Lists.
Logs for inactive services can be entered if the Service Date is not be more than one year prior to the current date.
You must be part of the student's Student Team.
If you don't see your students, authorized users can follow these instructions to resolve the issue.
Billable services: For contracted service providers, for your services to be paid for by the DOE, they must be logged as billable services. This involves (1) providing billable service information and (2) linking your service record to a Request for Provider (RFP) document. The instructions below provide more background and step-by-step instructions.
Entering Services Logs
To enter records into the Service Log:
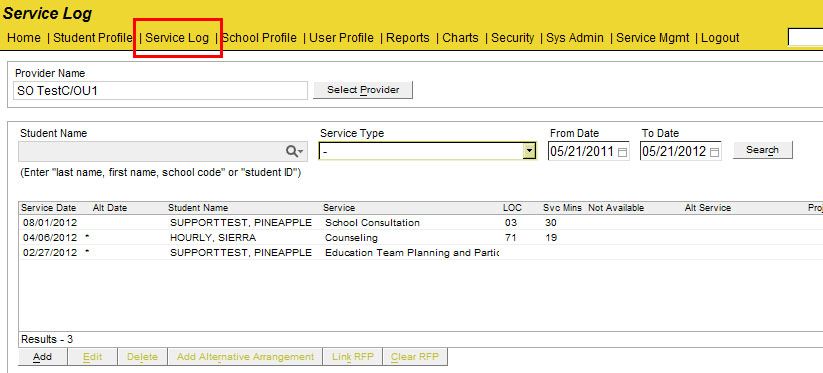
From the Navigation Menu, select Service Log.
If
you are logging a new service record, disregard the search box and
fields at the top of the screen. They are for sorting or filtering
existing service log records.
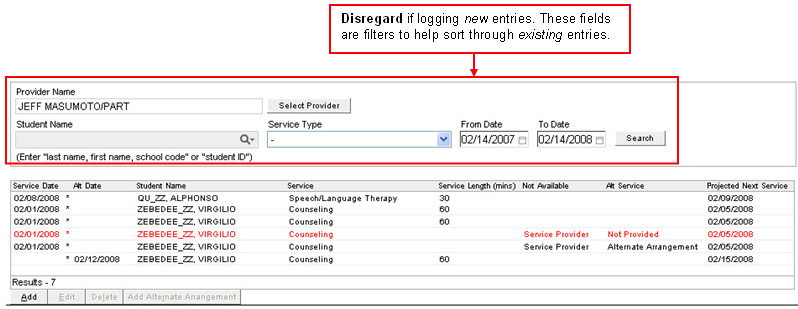
Please note:
The Select Provider button is available to authorized users only.
An asterisk (*) means the service is active.
Rows
in red are entries for Alternative Arrangements for
which the service was not provided. (Learn
more.)
To add a new Service Log entry, click Add.
When you enter Service Logs, you do so in
two parts: (a) create a template and (b)
generate log entries based on
the template you created.
Create a template - You will be creating a template that will be used to pre-populate multiple records. To do this, complete both the Service Template and Details Template tabs. Do not click Add Service Record until your template - including both Service Template and Details Template tabs - is complete.
Service Template tab - Enter the following fields, as appropriate:
Service Date
Projected Next Service Date
Service Length - Enter number of minutes.
Primary Method of Contact/Intervention
Group Size - If conducting a group session, enter the number of students in the group.
Actual Provider (If Not Regular Provider)
Students/Services - Click Add to select students. Please note:
The screen shows all students who are assigned to your services.
Service Types, Student Lists and Display Supports drop-down menus are filters to help you sort through your list of students.
To enter logs for inactive services, select All Supports from the Display Supports drop-down list. Logs for inactive services can be entered if the Service Date is not more than one year prior to the current date.
Checkmark a student or multiple students for whom you are entering Service Log entries, paying special attention to the Service column.
Click
OK.
You are returned to the Service
Template. Proceed to the Details
Template tab.
Details Template tab - Enter the following fields, as appropriate:
For a completed visit - Disregard Student/Provider Not Available.
If provider or student unavailable - Indicate whether provider or student was not available. Complete all related fields. If provider is unavailable, you will need to document alternate arrangements in a separate screen.
Enter
text description in Documentation
of Service field.
Generate
log entries - When you have entered all the necessary information
into the template tabs, you are ready to click Add
Service Record. After doing so, you will notice a log entry
is displayed below, pre-populated with information you just entered
in your template. You can begin editing the record as appropriate.
About Billable Services
- If the service is billable, checking Billable
will add new fields or make existing fields required:
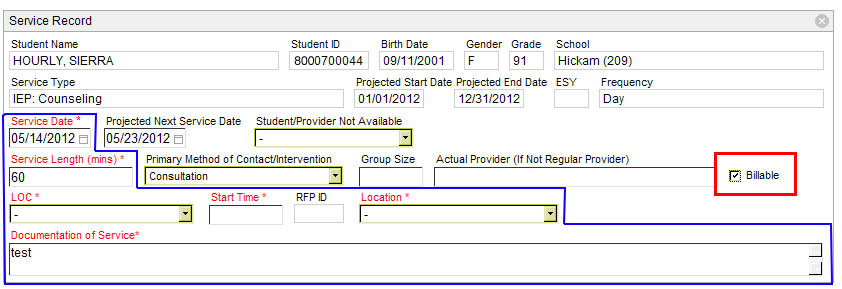
Service
Date - This field becomes required.
Service
Length (mins) - This field becomes required.
LOC
- LOC is the acronym for Level
of Care.
Start
Time - The time you started your service.
RFP
ID - This read-only field will be blank before the record
is saved.
Location
- The location of your service.
Documentation
of Service - Your description of the service you provided
at this particular time, date and location.
You can click Add Service Record to generate the
number of log entries you need. Records are added at the bottom
of the window.
TIP: If you have generated multiple records for a single
student, these tips will make editing dates easier. You can:
Type over the existing date.
Use the calendar icon to select a new date.
Place the cursor
in the date field. Press the following computer keyboard keys:
+ to move the date one day forward.
- to move the date one day back.
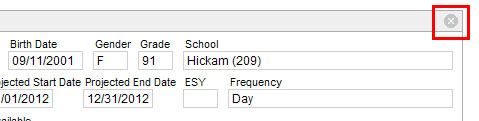
Delete any Service Record by clicking the X in the top right corner.
When you are done, click Save then Close.
You are now back on the main screen of the Service Log, and your record is displayed in the list.
To complete the process for making your services billable, you must link the record to an RFP. In the list, highlight the record you want to link.
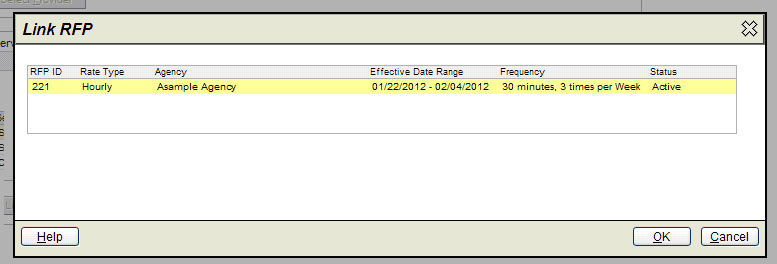
Click Link RFP. The Link RFP window is displayed with a list of RFPs. (NOTE: If the list is blank, please learn why and how to resolve the issue.)
Highlight
the appropriate RFP and click
OK.
Now that the record is linked to an RFP, the service can be processed for payment. Those with access can view the RFP by highlighting the record, then clicking Open RFP.
Entering Service Logs from Student Profile
To log a service from Student Profile, do the following:
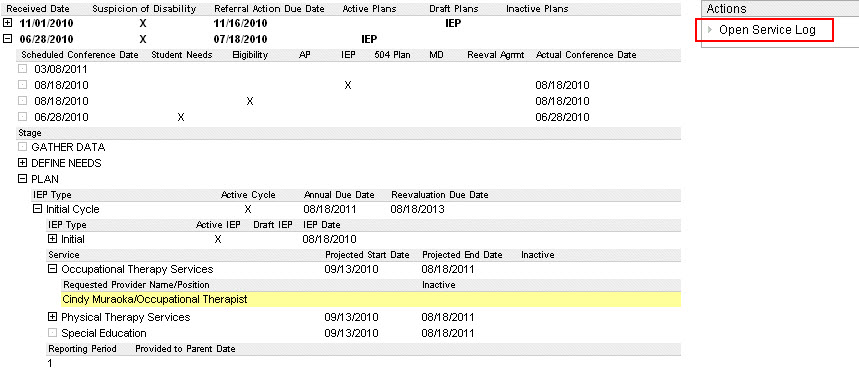
From the Referral tab, select the appropriate Referral and expand PLAN. Drill down to locate your service and name; or
From the Supports tab, expand the Services node and locate your service and name.
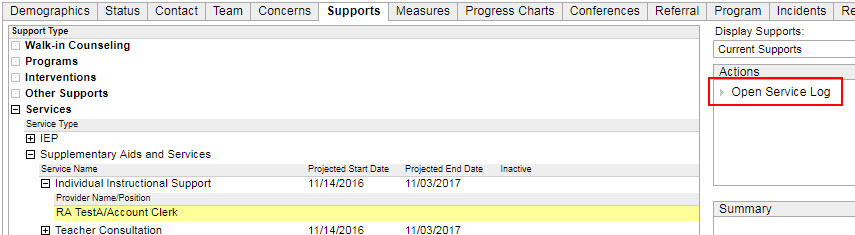
Select Open Service Log in the Actions Menu.
Click Add.
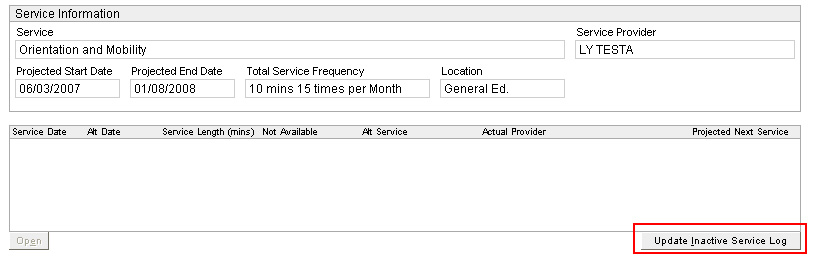
To log an inactive service, click Update Inactive Service Log.
The Add button is now displayed.
Click Add. Logs for inactive services can be entered if the Service Date is not more than one year prior to the current date.
Complete fields in the Service Record window as appropriate.
When you are done, click OK. Or, you may continue with additional entries under the service by clicking OK & Next.
After all entries are logged, click Save then Close.
Document Alternate Arrangements
If the provider was unavailable, the provider must document whether a service alternative was provided. If the service was rescheduled and provided later (an Alternate Arrangement), the visit must be documented as such.
After the alternate arrangement takes place, the visit must be documented as follows:
In the
Service Log screen, highlight
the appropriate log entry. NOTE:
Several entries may be marked Alternate
Arrangement. Select the entry that corresponds to the alternate
arrangement you are documenting.

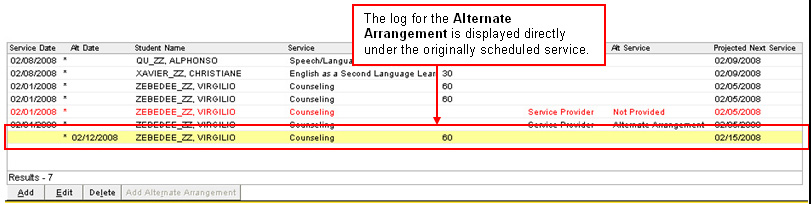
Near the bottom of the window, click Add Alternate Arrangement. NOTE: Rows without an asterisk (*) are for inactive services, and in those cases, the button is not available.
In the Service Record window, enter the appropriate information.
Click
Save then Close.
Your alternate arrangement log entries are displayed under the original
log entry.